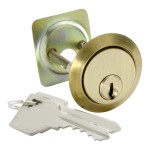
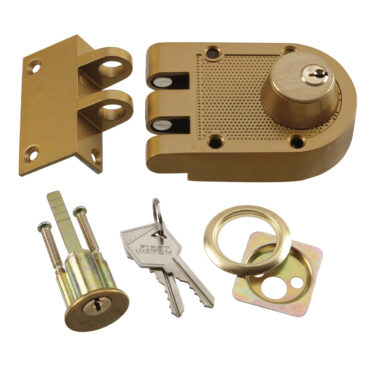
$10.39
SKU: 1150
Finish: Polished Brass
Zinc housing
5-pin tumbler lock
1-1/4″ bore hole required
Replacement lock cylinder for rim cylinder type lock sets
Key Blank: Weiser Blank WR5
Instructions:
1. Remove screws from old cylinder and remove cylinder.
2. Align connecting spindles of replacement cylinder to lock.
3. Insert screws into cylinder and tighten.
In stock
Add to Compare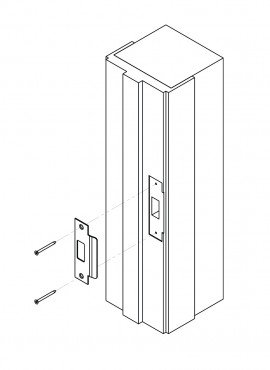
SKU: 1035, 1036
Finish: Polished Brass & Chrome
Fits standard size doors
Use on wood or metal jambs
Dimensions: 4-7/8″ long, 3-3/8″ lip
Door Thickness: All
Instructions:
1. Place strike on jamb, centered over latch hole.
2. Mark outline of strike on door jamb.
3. Using chisel, cut out area for strike 1/16″ deep.
4. Install screws.
$6.89
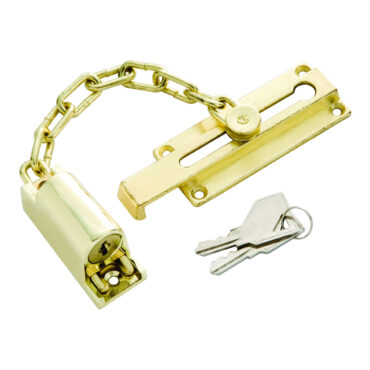
SKU:1800
Finish: Polished Brass
Can be unlocked with key from inside or outside
Bolt slides into keyed mechanism to lock
Secures door while allowing 2″ opening or viewing or ventilation
Key Blank: Briggs & Stratton B1 & Yale Blank Y13
$18.99
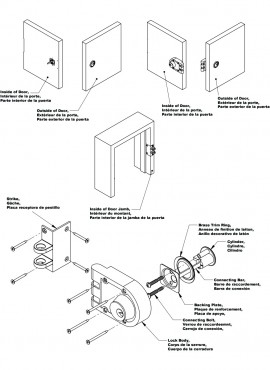
SKU: 1125
Finish: Brass Tone
5-pin tumbler with hardened steel pins
Dual single or double cylinder locking unit & strike
Locks door to jamb to prevent forced
entry
Door Thickness: 1-3/8″ to 2-1/4″
1-1/4″ bore required
Key Blank: Weiser Blank WR2/WR3
Instructions:
CAUTIONS: Do not unscrew small retaining screws at rear of cylinder. Use only dry lubricant (graphite) on locks. Keep away clear of foreign objects.
To Install:
1. Select convenient height for lock and place template against edge of door.
2. Mark hole positions. Bore 1-3/8″ hole for cylinder where indicated. Note: Bore through door until tip of drill barely emerges from other side. Remove drill bit and complete hole by drilling from opposite side to reduce splintering.
3. Drill 3/32″ diameter holes 1/2″ deep from attachment screws.
4. Insert cylinder and trim ring from outside of door. Attach backplate with two connecting bolts. Note: If bolts are too long, saw or break at groove, using caution to avoid marring the thread.
5. Cut or break connecting bar so it projects 3/8″ to 1/2″ beyond the inside of the door.
6. Plack lock on door so connecting bar enters “X” slot in back of lock. Secure with large mounting screws.
7. Align strike carefully, using template as a guide. Draw outline of strike on door jamb trim and chisel wood away (mortise) so strike mates freely with locking bars.
8. Mark mounting homes for strike, dill pilot holes, and secure strike to door jamb with screws provided.
$46.99

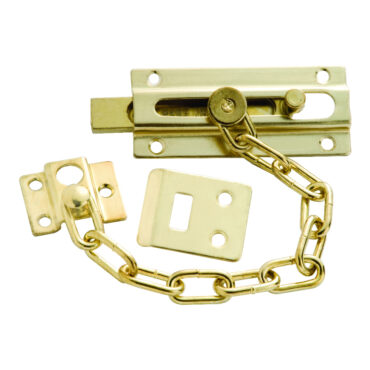
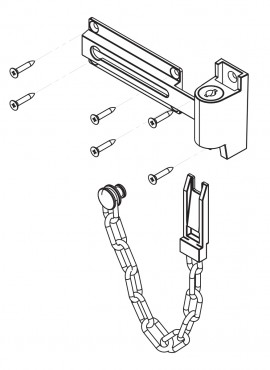
SKU: 1879
Finish: Polished Brass
Additional security of sliding dead bolt
Secures door while allowing opening for viewing or ventilation
Instructions:
1. Mount side place with sliding bolt inside on door at convenient height. Edge of slide place should be flush with door edge. Install four screws.
2. Mount strike place on door jamb so that sliding bolt engages the hole when door is fully closed. If door fit is tight, chisel out a recess on jamb for the strike plate. Install two screws.
3. Mount chain holder on jamb so that knob on chain will reach the hole in the slide plate when bolt is retracted. Mark and drill three pilot holes 3/32″ diameter and 1-1/4″ deep. Install chain holder with three screws.
$13.29
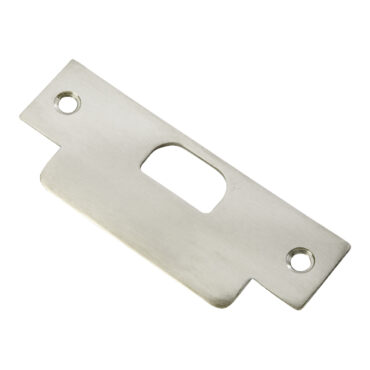
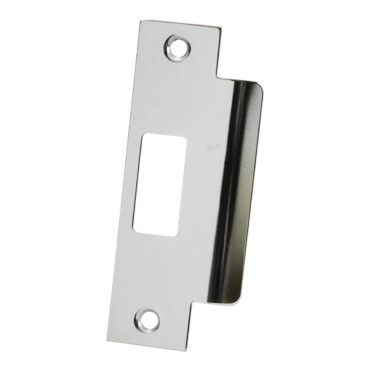
SKU: 1038
Finish: Stainless Steel
Use on wood or metal jambs
Works with most commercial Grade 1 lock sets
Dimensions: 1-1/4″ x 4-7/8″
Door Thickness: All
Instructions:
1. Remove old strike
2. Place strike on jamb, centered over latch hole.
3. Mark outline of strike on door jamb.
4. Using chisel, cut out area for strike 1/16″ deep.
5. Install screws.
$8.09