$8.69
SKU: 1016-PB
Finish: Polished Brass
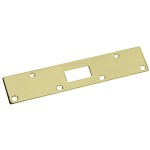
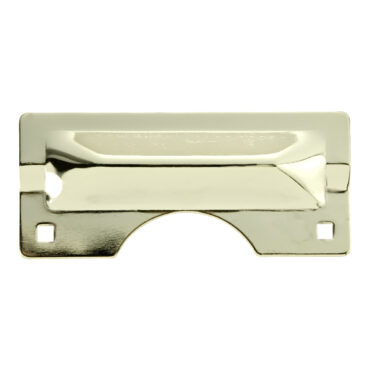
Replaces most deadbolt strikes for increased security
Strengthens or repairs wood jambs
3” screws attach to wall stud for increased security
Dimensions: 1-5/8” x 11”
Door Thickness: 1-3/4″ or thicker
Instructions:
1. Remove old strike.
2. Position new strike in place and mark the two mounting holes on the side of the strike away from the door jamb. Chisel out area behind strike if needed or if a flush fit is desired.
3. Drill 1/8″ pilot holes 1″ deep. Install small screws.
4. Close door and operate lock. If lock operates correctly, drill remaining two pilot holes with a 1/8″ drill bit 2″ deep. Install long screws. If lock does not operate correctly, reposition strike plate and retest.
In stock
Add to Compare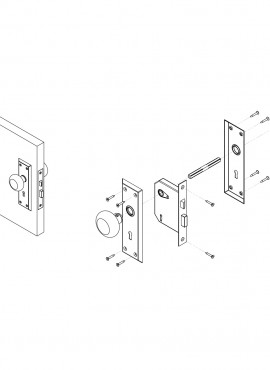
SKU:1129
Finish: Polished Brass
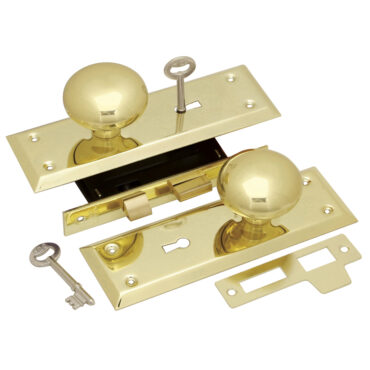
Knobs and trim plates
Case-hardened steel case
Lock bolt is key activated both inside & outside
Bolt reversible to left and right handed door
Requires mortise cutout
Replaces most bit key mortise locks with 2-1/4″ backset
Instructions:
1. Fold template (see insert included) along dotted line and wrap around inside edge of door at a convenient height. mark holes A and B through template.
2. Position vertical line C in center of door thickness and mark holes as shown. Be sure the template does not move up or down.
3. Remove template and drill seven 5/8″ diameter holes 3″ into edge of door where C holes were drawn. Chisel out remaining wood to form a pocket in the edge of the door measuring 5/8″ wide by 4-1/8″ long by 3″ deep.
4. Drill one 3/4″ hole on mark A through the door. Drill four 5/16″ holes as indicated through the door to form slot B.
5. Insert mortise lock into pocket, draw a line around the face plate, and remove lock. Chisel out the wood within the lines to a depth of approximately 3/32″. Insert lock occasionally to ensure proper depth.
6. Insert lock into door and attach with two flathead screws.
7. Position trim plates on door in line with lock and attach using eight oval-head screws.
8. Insert spindle through hole A and attach knobs at each end of spindle.
9. Position strike in line with latch and attach with two flathead screws.
$41.99
SKU: 1089, 1089-SSS
Finishes: Polished Brass
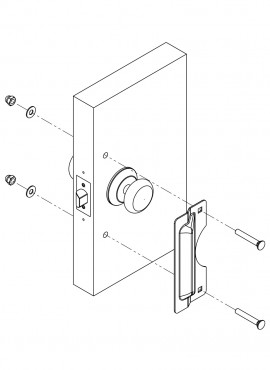
Out-swinging doors only
Secures against forced entry
Protects latch or bolt
Residential or commercial use
Dimensions: 3″ x 7″
Backset: Locksets with 2-3/4″ backset
Instructions:
1. Place latch guard on door and center on lock.
2. Mark center of mounting holes.
3. Drill two 3/8″ holes through door.
4. Install bolts, washers and nuts. Tighten securely.
$13.79

SKU: 1165, 1165-SN
Finishes: Polished Brass and Satin Nickel
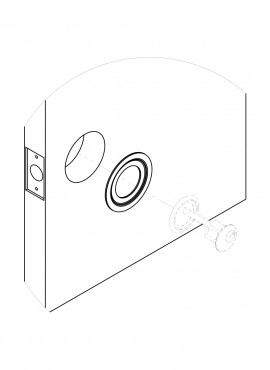
Reduces bore from 2-1/8″ to 1-1/2″
For use with some deadbolts and rim cylinders
Instructions:
1. Remove deadbolt from door.
2. Install trim against door and them reinstall deadbolt.
$7.29 – $9.19
SKU: 1041, 1041-SN
Finish: Polished Brass, Solid Stainless Steel, Vintage Bronze, Chrome & Satin Nickel
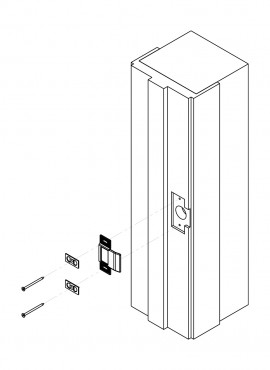
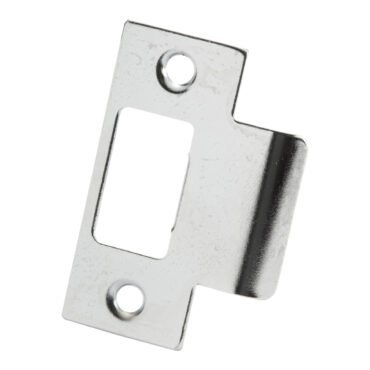
Fits standard size doors
Use on wood or metal jambs
Common replacement for most Grade 2 & 3 locksets
Dimensions: 1-1/8″ x 2-3/4″
Door Thickness: All
Instructions:
1. Remove old strike.
2. Place new strike on door jamb centered with latch hole.
3. Install screws provided and adjust tab with screw driver for proper fit.
$6.89
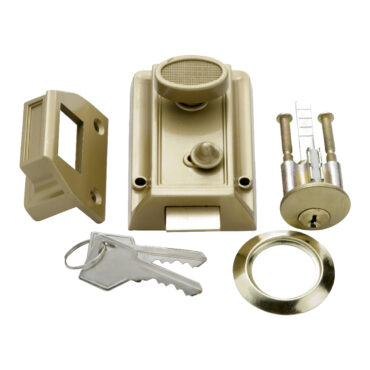
SKU: 1105, 1105-SN
Finishes: Polished Brass & Satin Nickel
Latch hold-back (prevents locking yourself out)
5-pin tumbler with hardened steel pins
1-1/4″ bore required
Spring latch for automatic locking
Door Thickness: 1-3/8″ to 2-1/4″
Key Blank: Weiser Blank WR2/WR3
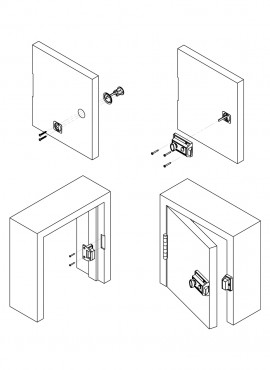
Instructions:
1. At desired height bore the hole for the cylinder 1-1/4″ diameter, with center at a distance of 2-3/8″ from edge of door.
2. Insert cylinder and ring from he outside of door and place back plate on inside of door. Connect back plate to cylinder with two connecting screws. Cut screws to proper length relative to door thickness.
3. Cut off connecting bar so that it projects 3/8″ beyond inside of door.
4. Plack lock on door so that connecting bar enters slot. Mark holes. Remove lock and drill 1/8″ pilot holes. Attache lock to door by inserting screws through lock into door.
5. Place strike plate on door jamb. Mark holes. Remove strike plate and drill 1/8″ pilot holes.
6. As needed, use chisel to cut door jamb so that strike is flush with door jamb.
$37.09