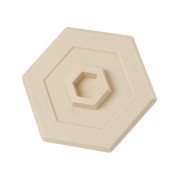
$6.49
SKU: 6001
Finish: Almond
Self adhesive & paintable
Repairs or prevents wall damage
Proposition 65 Warning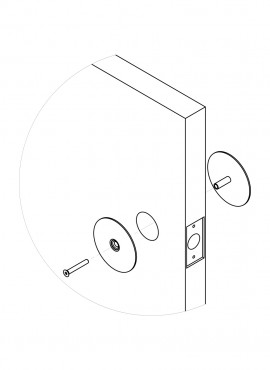
SKU: 1173
Finish: Prime Coat Gray
Helps maintain entry security
Covers lockset holes from 1/2″ to 2-1/8″
Fits doors to 1-3/4″ thick
Dimensions: 2-5/8″ diameter
Instructions:
1. Place door plate with cylinder extending into door hole.
2. Place other plate on opposite side of door with indentation facing door hole.
3. Insert screw through plate into cylinder and tighten.
$6.89
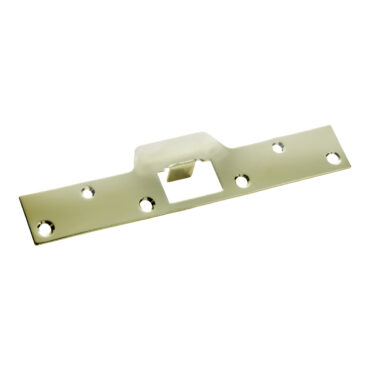
SKU: 1025, 1025-SSS, 1025-VB
Finishes: Polished Brass, Solid Stainless Steel & Vintage Bronze
Fits standard size doors
Strengthens or repairs wood jambs
3″ screws attach to wall stud for extra security
Dimensions: 1-1/4″ x 8″
Door Thickness: All
Instructions:
1. Remove old strike.
2. Position new strike in place and mark the two mounting holes on the side of the strike away from the door jamb. Chisel out area behind strike if needed or if a flush fit is desired.
3. Drill 1/8″ pilot holes 1″ deep. Install small screws.
4. Close door and operate lock. If lock operates correctly, drill remaining two pilot holes with a 1/8″ drill bit 2″ deep. Install long screws. If lock does not operate correctly, reposition strike place and retest.
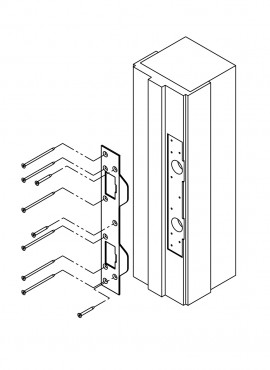
$11.49
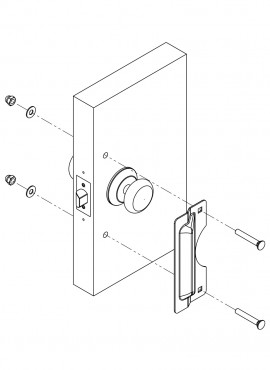
SKU: 1090
Finish: Chrome
Out-swinging doors only
Secures against forced entry
Protects latch or bolt
Residential or commercial use
Dimensions: 3″ x 7″
Backset: Locksets with 2-3/4″ backset
Instructions:
1. Place latch guard on door and center on lock.
2. Mark center of mounting holes.
3. Drill two 3/8″ holes through door.
4. Install bolts, washer and nuts. Tighten securely.
Note: If latch guard contacts strike lip, bend in slightly with hammer.
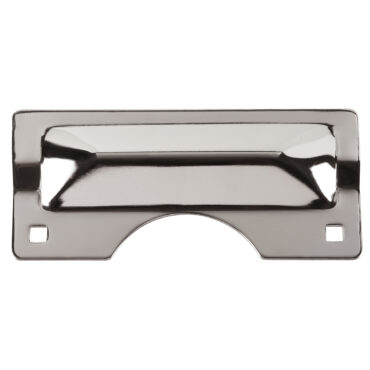
$13.79
SKU: 1089, 1089-SSS
Finishes: Polished Brass
Out-swinging doors only
Secures against forced entry
Protects latch or bolt
Residential or commercial use
Dimensions: 3″ x 7″
Backset: Locksets with 2-3/4″ backset
Instructions:
1. Place latch guard on door and center on lock.
2. Mark center of mounting holes.
3. Drill two 3/8″ holes through door.
4. Install bolts, washers and nuts. Tighten securely.
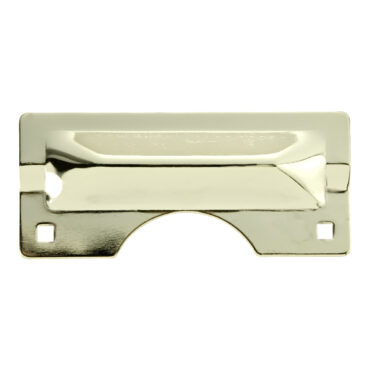
$13.79
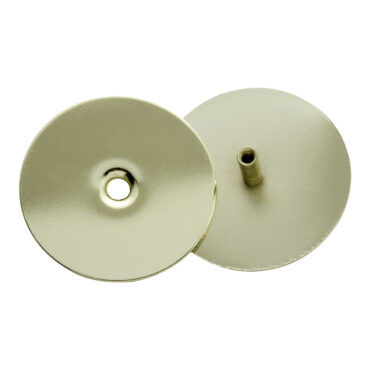
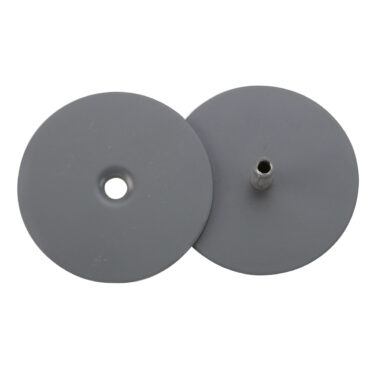
SKU: 1172, 1172-SN, 1172-VB
Finishes: Polished Brass, Satin Nickel and Vintage Bronze
Helps maintain entry security
Covers lockset holes from 1/2″ to 2-1/8″
Fits doors to 1-3/4″ thick
Dimensions: 2-5/8″ diameter
Instructions:
1. Place door plate with cylinder extending into door hole.
2. Place other plate on opposite side of door with indentation facing door hole.
3. Insert screw through plate into cylinder and tighten.
$8.29